Victory Is Mine
2019-08-18
1742AD
T766

Score:   5,514
Final: 161,727
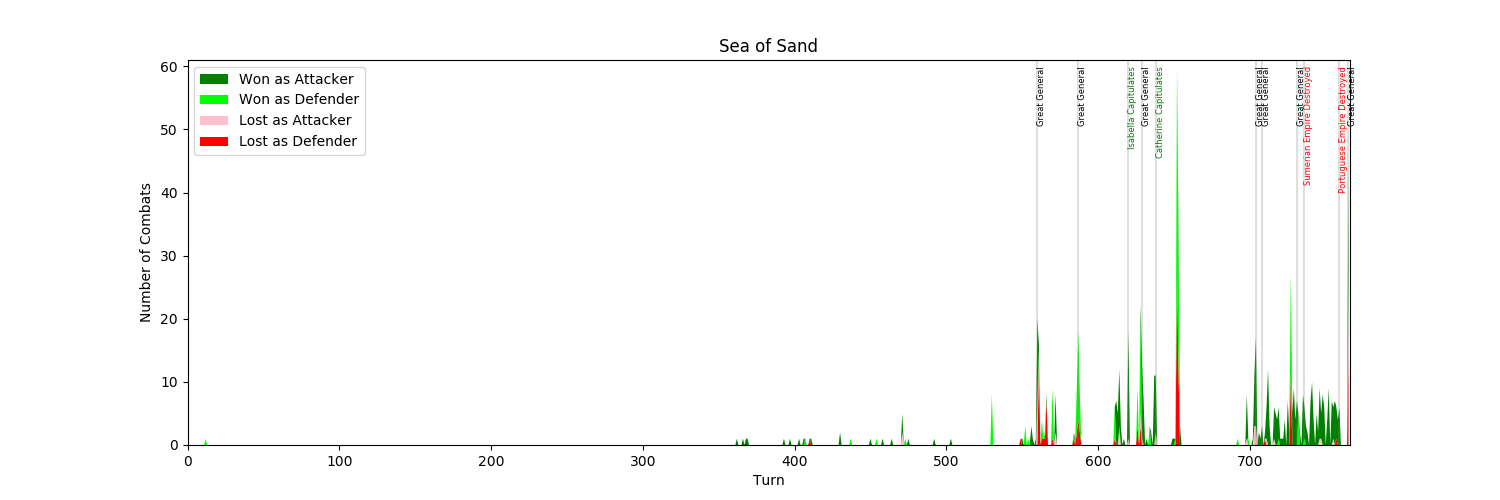
The Victory was Complete & Total!
All of the Combat took place after Astronomy. I shared a Continent with Asoka. And I did not see the advantage in going to War with him. In fact, it would have been really nice to form a Permanent Alliance with Asoka. Unfortunately, that never happened. I have recently become acquainted with the idea of Gifting a City for the early Diplomatic Bonus. And I may have been able to do something of the sort in this game with Asoka. Certainly, I had the spare food to Build an extra Settler or two.
Both Spain & Russia Capitulated. I may have been better off refusing their surrender like I did for Sumerian & Portugal. Of course, I was much more powerful by the end. So, I was in a position to leisurely eat the later two whole.
Though, I'm probably better off Settling my Great Generals, I am thinking about forcing the issue next game and not settling a single one, using them all to upgrade units in the field.
{In the next game, I did attach all my Great Generals to individual Units. But as one cannot attach more than a single Great General to any one Unit, the advantage was minimal. So, I'm going back to Settling Great Generals... and/or using them to build Military Academies, which I hardly ever do.}
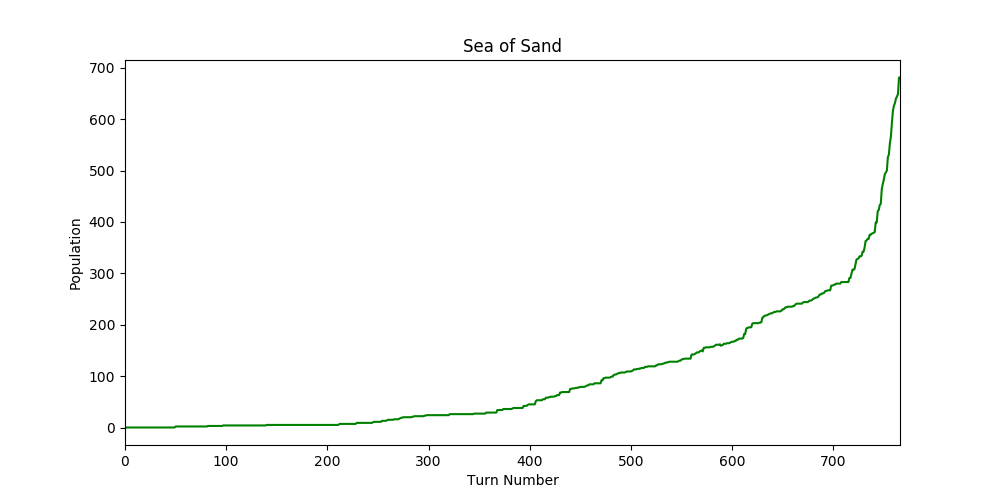
Population grows at a respectable clip. The first bump at T400 likely comes from infill (and then, military expansion). While the bump at T725 comes from Sid's Sushi (a dominating late game mechanic), along with taking over the world.
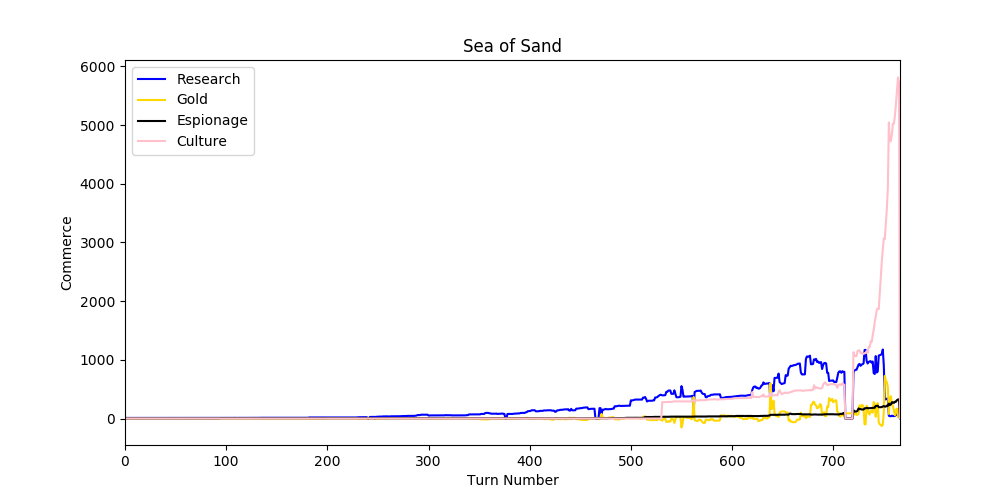
As to the graph on the right, I should either take advantage of all that late game Culture... or try to flip it into Research.
I played this Map at least Five Times. Since I have multiple Log File Saves and it's been over Six Months from when I started to when I finished, I don't remember exactly how many times I played it. I think I may have played the Third Game over Three Times, loading from some critical Wonder Completion Date.
It doesn't matter.
And if it does, it's all there in the notes (
021-sea-of-sand-notes.txt).
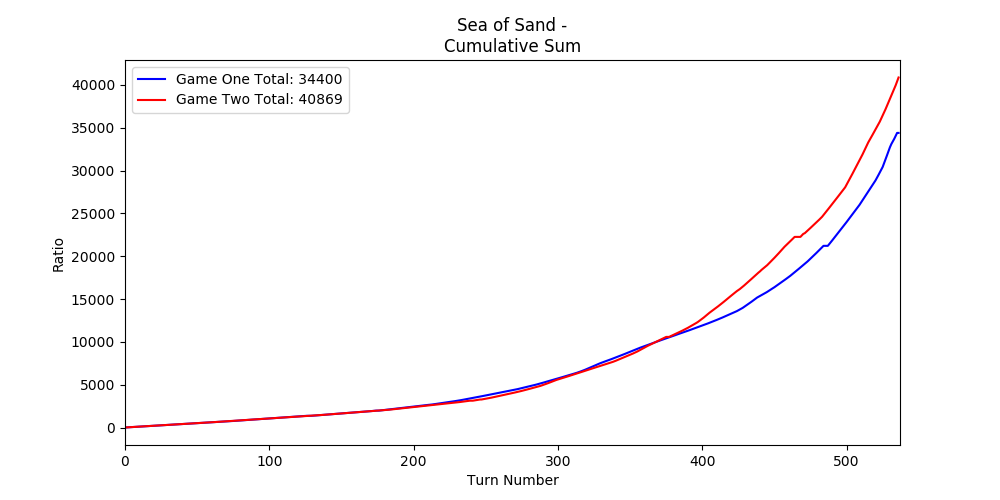
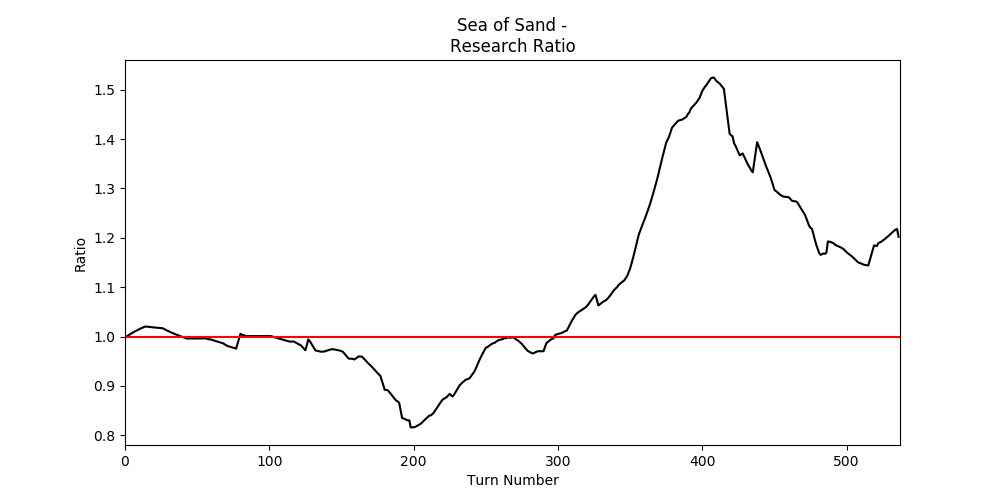
The graphs above compare Research in the First Game (Blue on the left, Red on the right) in this series to the Last Game (Red on the left, Black on the right). All the preceding graphs are for the Last Game.
I attribute the greater Research Rate in the Last Game to building The Great Lighthouse. I believe I have been undervaluing The Great Lighthouse and overvaluing The Pyramids.
If I play a water start next game (ideally, with a water born leader), I will most definitely build The Great Lighthouse and circle the Continent, Settling my Cities on the coast.
And now, I'm daydreaming about a William van Oranje / Joao II and Dutch / Portugal Hybrid Civilization. I wonder how one goes about doing that?
{No worries. I have you covered. The next write-up covers this customization.}
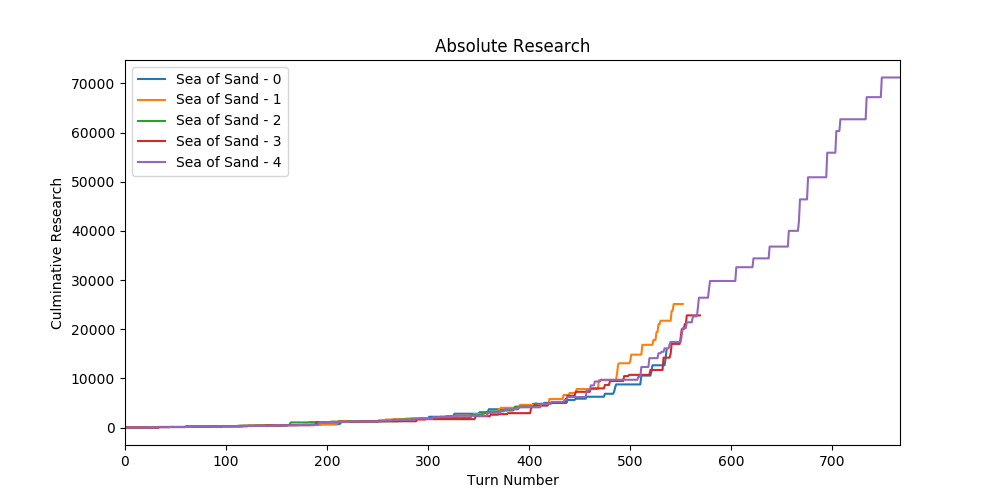
The Graph on the left shows a Running Total of All Research as figured by a Value Weighting of all Known Technologies (whether Researched, Traded, Hut Popped, or whatever).
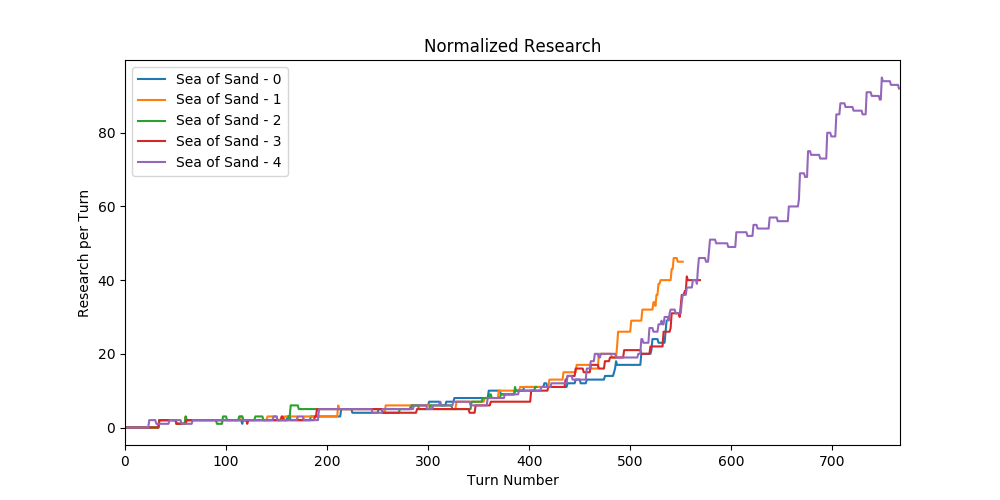
The Graph on the Right shows the same thing divided by Turn Number.
Both Graphs show a stacked comparison of the Five Major Attempts I made at this map.
I question whether either of these graphs provide much clarity.
Research Order
On top of that, I pulled my Research Order from the LogFiles.
21_sea_sand_tech_order_0
21_sea_sand_tech_order_1
21_sea_sand_tech_order_2
21_sea_sand_tech_order_3
21_sea_sand_tech_order_4
And here's the same thing from a previous game.
16_cho_ko_nuts_tech_order
I am not convinced these listing are overly useful. If one wants to win, go the Military Route. If one wants to have fun, more divergent options are available.
As a Mathematical Aside, I will note in passing the difficulty in comparing Ordered Lists. My Tech Order Listings are so different, a simple
diff provides no clarity. And much of the overlap has been hard-wired into the lists by the nature of the Tech Tree.
In the future, if I wish to compare Tech Orders, I will simply list the relative priorities (such as Sailing for The Great Lighthouse, Optics for Caravels, and so on). This would make future comparisons easier, as there are fewer data points. And said data points would (by definition) be more important as they'd only list Target Techs and exclude any Prerequisite Techs.
In the first few games of this map, I prioritized Religion. In the last one, I did not. Oddly, this had nothing to do with win.
Free Religion
In the Final Game, I survived Post Optics Contact (and the ensuing invasion at Astronomy) soley by switching to Free Religion or No Religion (I forget which).
There was nothing else in my Game Play that was as important as this single decision.
At contact, I was not strong enough to fight off multiple invaders.
And 100 Turns later it did not make any difference if they hated me, when I switched back to my Favoured Religion.
Permanent Alliances
I would have liked to have had a Permanent Alliance with Asoka this game. Unfortunately (for him, not me), by the time we (or I) met all of the requirements, I'd become too powerful; and as such, no longer met the requirements.
For a Permanent Alliance:
- Shared Military Struggle
- For 40 Turns
- Presumably, 120 Turns on Marathon
- Neither can be the Most Powerful Civilizations in the Game
- The other Civilizations Combined must be Twice as Powerful as the Alliance
- Be on Friendly Terms
- Have either of the Requisite Techs
I doubt I will ever have a Permanent Alliance unless I custom build a game or start playing on higher levels.
Apostolic Palace
In addition to the other Religious Wonders (covered elsewhere, so I will not do so again), any Monk Economy should strive for the Apostolic Palace as it provides +2 Hammers per Religious Building (of the appropriate denomination).
Eh, I lied. Here you go.
The Full Monk Economy
- The Spiral Minaret
- The Sistine Chapel
- University of Sankore
- The Apostolic Palace
The Bonus is for each Temple, Monastery, or Cathedral of the appropriate type. While the bonuses last, they are pretty awesome. On the other hand, the Hammer Investment is not trivial.
Floodplains
Floodplains give a 0.4 Unhealthy Bonus (and/or Detriment) per Floodplain in the Fat Cross. This number is rounded down (via a Floor, I believe), so the first two Floodplains are free.
Wonder Fail Gold
Now, typically there are better things to build than Wonders. But everyone once in while in the early game, there are not.
If a Wonder is built and any other City has Invested Hammers into that Wonder, the Hammers are converted into Fail Gold:
- One Gold per Hammer Invested.
- Because this is after the Resource and Industrious Trait Bonuses, one can get up to 2.5x Gold per Hammer...
- Even more with Forges and Factories.
- Multiple Instances are OK.
- One can work on a Wonder in one City; and then, continue on in another.
- Fail Gold is given for both.
- You can be the one who completes the Wonder...
- It works for National Wonders, too.
In most instances, I'd rather get the Wonder. But then, maybe not.
Wonders are becoming less important to me; mainly, because a Domination Victory is the key to a High Point Score. And almost none of the Wonders aid in a Military Conquest.
Logfile Madness
In regards to these write-up, game saves, and logfiles, I allowed my eagerness to play to confound the numbering system for my logfiles and game saves... or you know, my existing system just sucks.
As a tentative idea (and starting game after next at best, as I'm almost done with the next game), I will start all future save games with a seven digit identifier followed by the Turn Number:
So, 021-01-01-T100 would be the first save of the first attempt of the Map (and/or Game) 021 taken on Turn 100.
While 021-00-00-T0 will be the Initial Save for the 21
st Game.
That way, I have enough digits to account for any number of attempts (well, up to 99 of them) on any given Map, which so far is way more than I need... even when floundering on the restarts, as I did in this game. I probably relaunched this game upwards of fifty times... for which I have the logfiles for nineteen.
I mean, I could even see doing AAA-BBB-CCC-TXXX (for up to a thousand attempts and saves per attempt), but that seems like a bit of overkill and I don't need the extra digits.
It's boring bookkeeping to be sure. But for these sort of continued write-ups, bookkeeping becomes important... or at least, something one has to think about.
Stop Researching
Although it is very important (to me) to have a Technology Lead, I should stop Tech'ing for the last leg of the game: the last 20-100 Turns or so, depending. Once I have my final Military Techs, further advances don't matter. I mean, there is almost nothing to be done with a Technology on the last Turn... if not last 10-20 Turns.
It's a thought that needs refinement.
Capitulation
I like having Vassals. But in the end, I accept Capitulation far too readily. There is more to be gained by eating my opponents whole.
Another Go
Perhaps, the biggest side effect of doing these write-ups is a desire to play another game. As I review my notes for the latest game, I invariably start to make plans in my head for a future game.
